Creating GCP based On-Demand Labs (ODL)
On Demand labs are created from the lab requests submitted by requestors of any organization which contains the track requested by them. This track contains the specifications of the labs, i.e., the resources which are to be deployed in the respective Cloud Platform and any kind of configurations which these resources require. The On-Demand lab also contains the time duration for which an environment will be available to the end user and the expiry of the Lab after which the instructors and users will not be able to access the Lab. It will also have the user limit set as per the attendee count that will be given in the lab request. There are self-services and capabilities enabled for the Instructors of the Labs such as view and capabilities on Users Page and Control Panel Page.
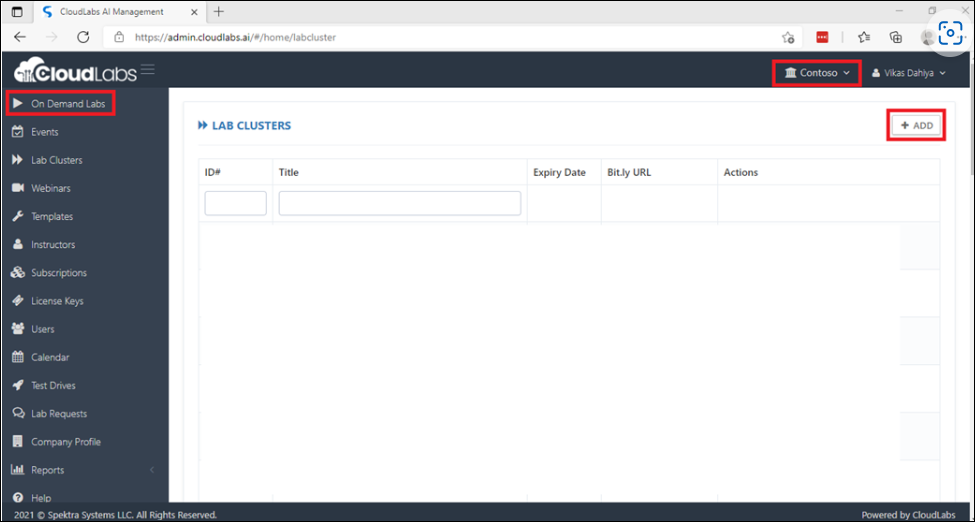
Navigate to https://admin.cloudlabs.ai/ and Login to the Admin Portal or follow this detailed guide click here
Select your Tenant
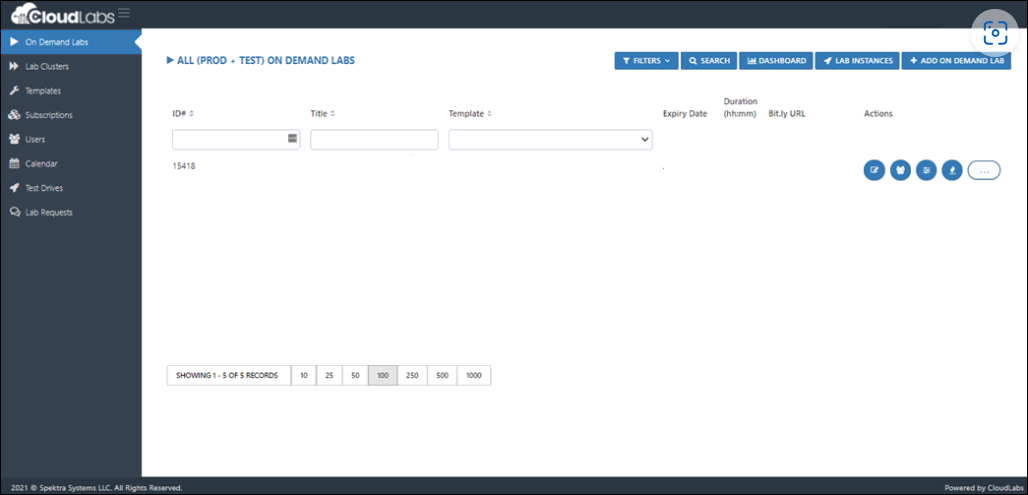
Click on On Demand Labs from the left navigation pane.
Click on + ADD ON DEMAND LAB and fill up the required information.
This document has been divided into 4 sections, each section covering the respective options on the underlined screenshot.
Section 1:
Name (Required): Enter a preferred name for your ODL. This will help you identify the labs in the listed ODLs.
Tip: While naming the On Demand Lab, use the following pattern (Track name + Venue Location + Date). This way you can quickly identify the ODLs at ease and will reduce confusion.
Template (Required): Select the appropriate template for the lab using the drop-down list.
Tip: Please refer to the Template documentation on steps to create a new template. Upon successful creation of the template, it will appear in the dropdown list under Templates in ODL creation screen.
Zones (Required): Select the nearest zone for the deployment (Available zones will be automatically fetched by Selecting a template.)
Description (Required): Provide a brief description to describe about your lab, its resources and technologies as well as its learnings and benefits. It will be visible to end users too.
Lab Launch Page Description: Lab Launch page is basically where you launch your lab environment. You can add any additional instructions to this page that you think are relevant for the users.
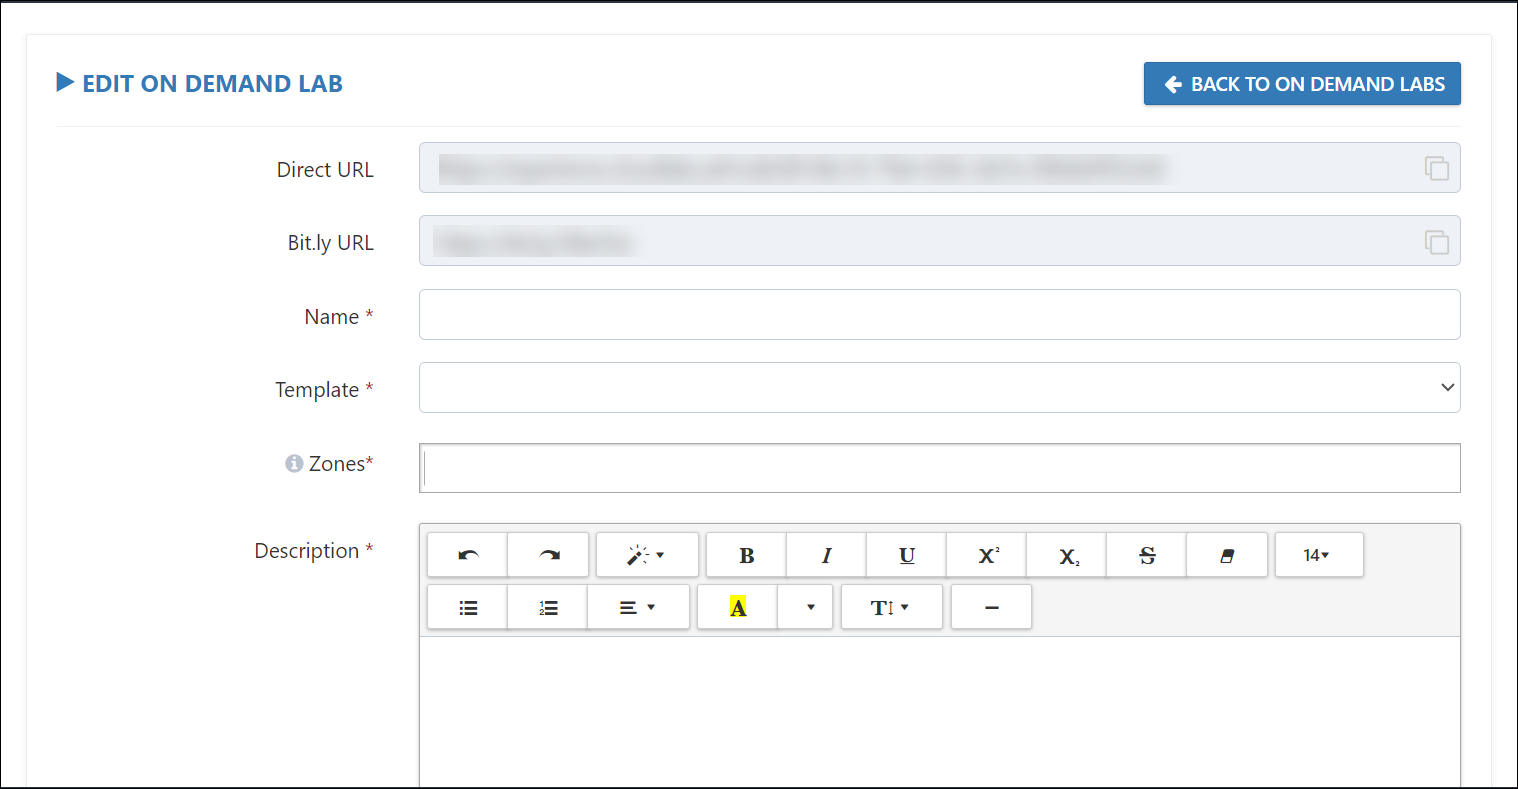
Custom Instructions: Leave it as default.
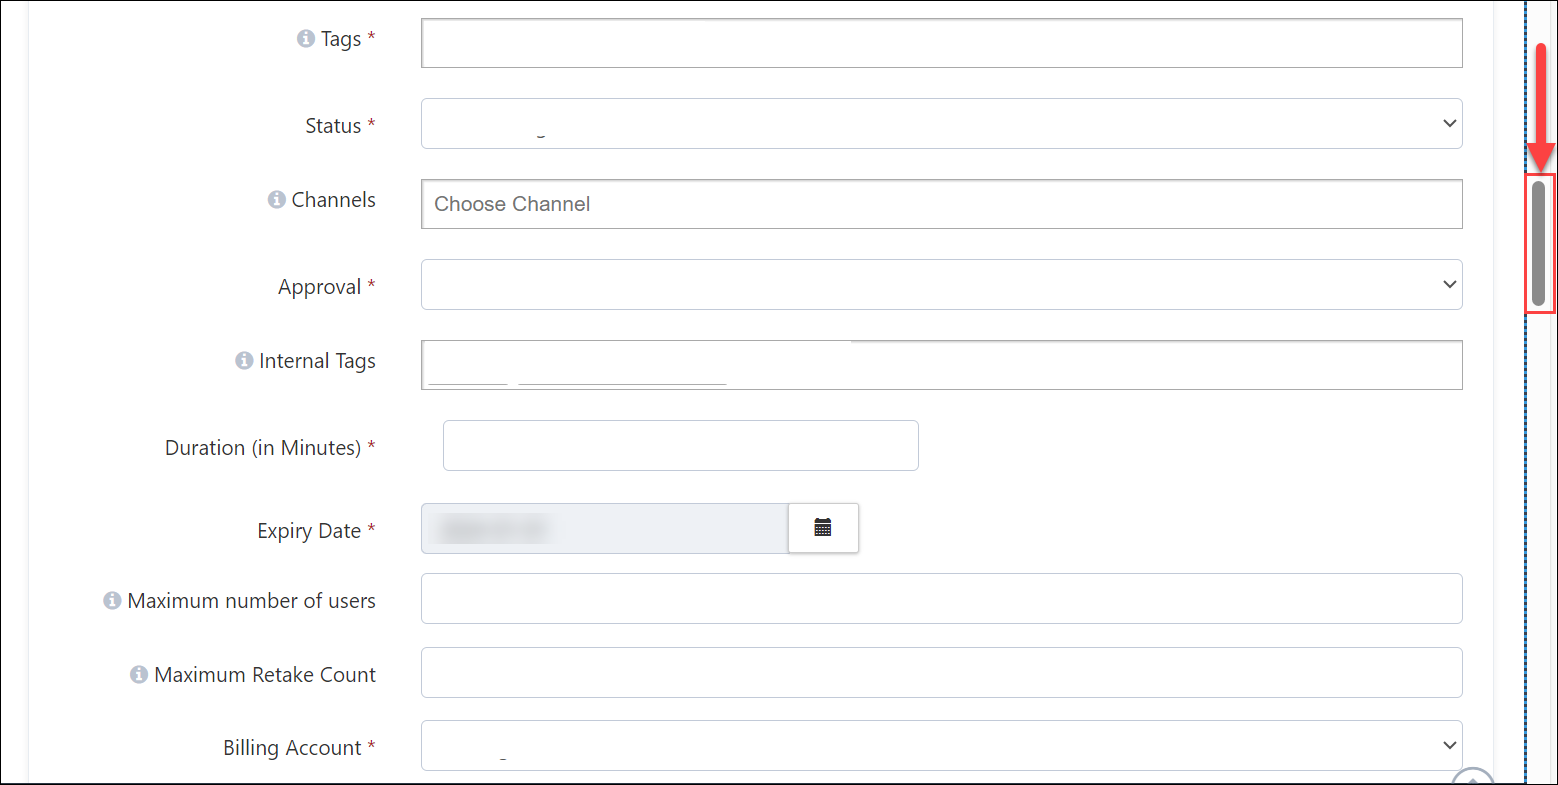
Section 2:
Tags (Required): Tags help you add keywords to your ODL, generally useful to identify the ODL and are displayed in the registration page as well
Status (Required): Select the appropriate Registration/Activation status for your ODL.
Channels: Specify the channels to which this on-demand lab belongs to.
Approval (Required): Select how would you like to approve the requests.
Duration (in minutes) (Required): Enter the duration in minutes for which you would like the environment to be active. The duration starts as soon as the user signs up for the lab and environment is auto deleted once the duration expires. Once the environment is deleted, it cannot be recovered again.
Expiry date (Required): Enter the event end date.
Maximum number of Users: Number of users who can access the ODL
Tip: Keep the expected attendee count with 2 extra, if expected attendee count is 8 then keep 10
Maximum retake count: Maximum number of times an email ID can be used to register for the ODL. (default is 0).
Billing Account (Required): Here you can select your billing account which would be used to host the deployments in the lab.
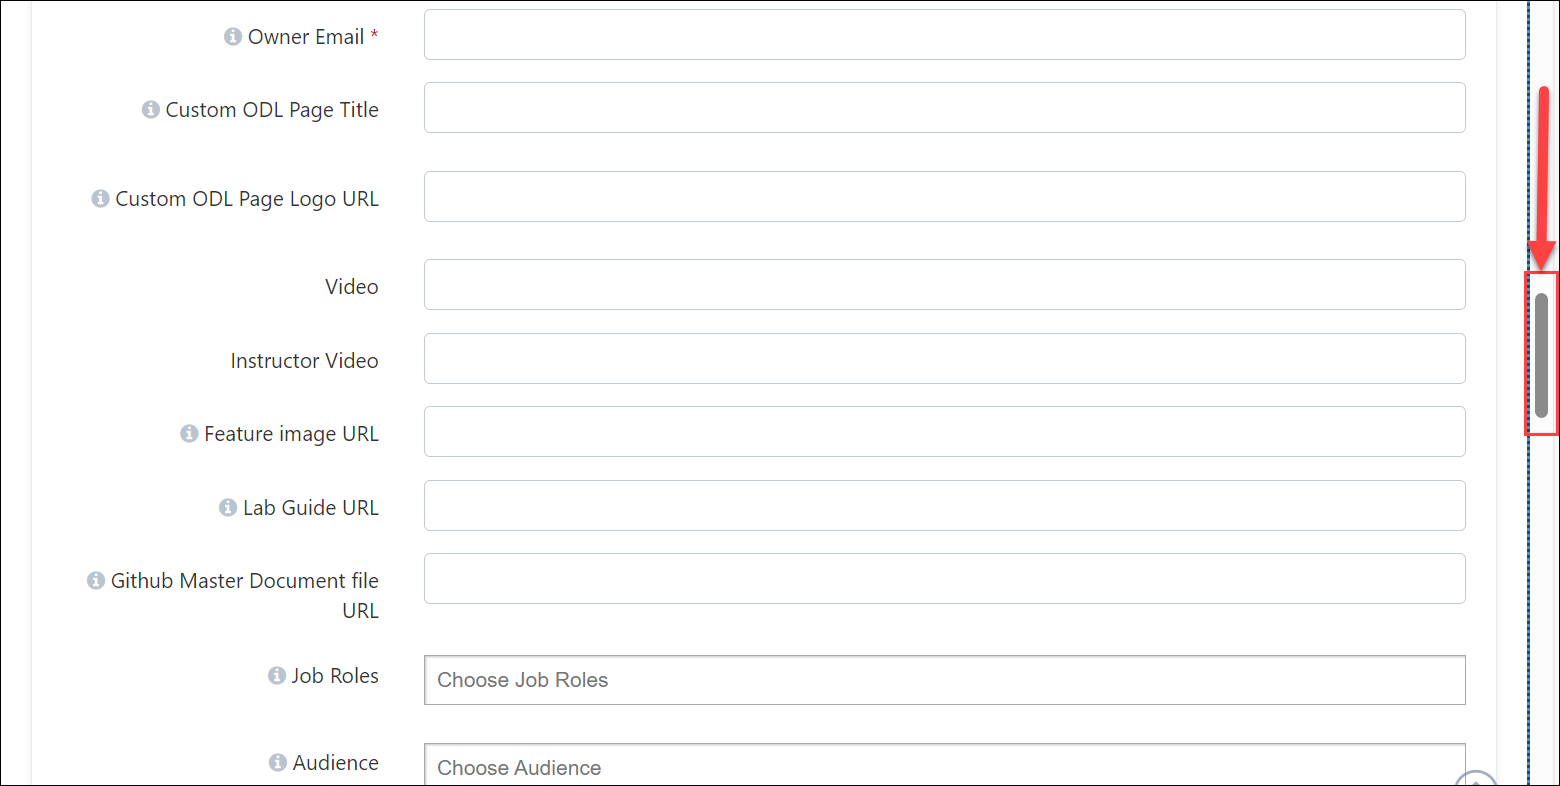
Owner email (Required): Email ID entered here will be receiving all the communications and notifications for the ODL.
Custom ODL Page Title: In case you want to customize the title of the Hands-on-Lab Registration page, you can provide a title in this field.
Custom ODL Page Logo URL: In case you want to customize the logo of the Hands-on-Lab Registration page, you can provide the URL of logo in this field.
Video: This option can be used for adding a video link.
Section 3:
Instructor Video: You may use this option to add any pre-recorded video from the instructors.
Feature image URL: This field can be used to add a custom image on the registration page.
Lab Guide URL: You may provide a link for any specific lab guide to be used for the lab
Github Master Document file URL: Here you can provide a GitHub link for a reference document.
Job Roles: Select either of the pre-defined user roles for your environment.
Audience: Select either of the roles below to define your audience.
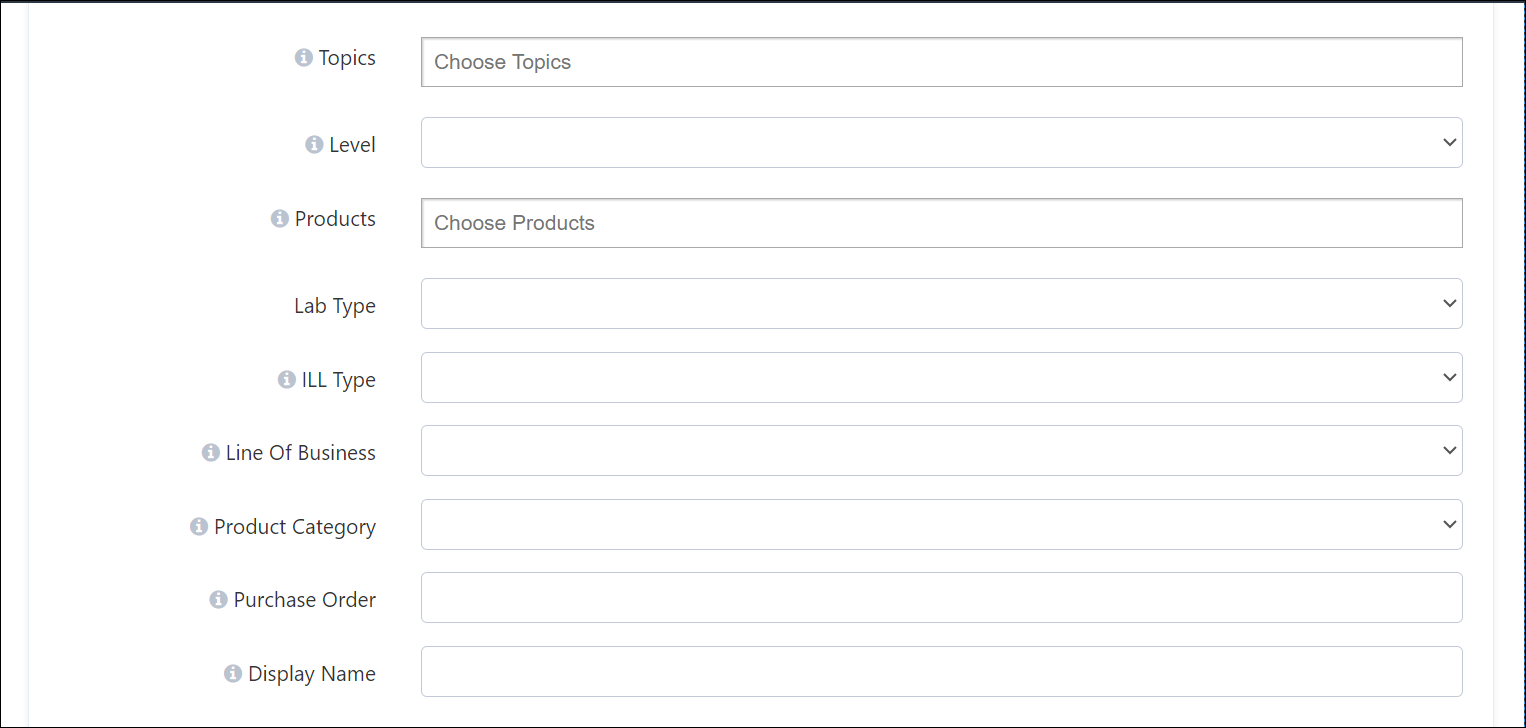
Topics: Below are some of the pre-defined topics which you can select while creating an ODL
Level: You can use this to define the expertise level of the user.
Products: Select product category that defined this lab.
Lab Type: These are custom codes specific for custom integration, unless we provide a specific configuration. (preferable to be left blank unless pre-informed otherwise)
ILL Type: These are custom codes specific for custom integration, unless we provide a specific configuration. (preferable to be left blank unless pre-informed otherwise)
Line Of Business: You can specify the target business segment specific for this lab.
Product Category: Select either of the below mentioned categories that define this lab
Purchase Order: This field can be used to mention the purchase order number. It is helpful in scenarios where you wish to create internal reporting specifying the order number (usually where you have multiple ODLs)
Section 4:
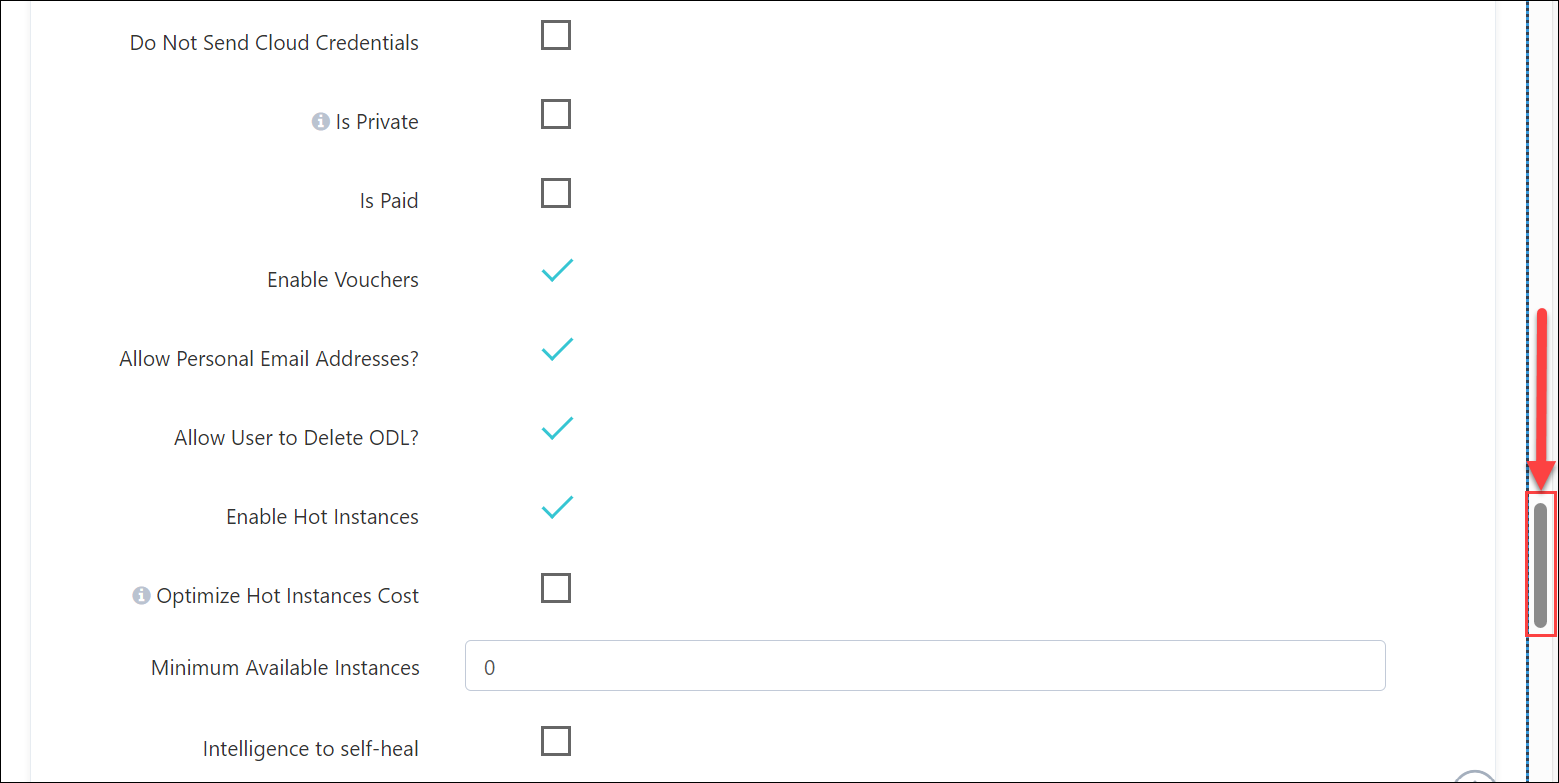
Do Not Send Cloud Credentials: Check this option if you do not wish to the credentials to be visible in the master document.
Is Private: Hide this ODL from Channel and test drives
Enable Vouchers: Check this option if you have enabled vouchers for your lab.
Allow Personal Email Addresses? Select this option if you would like to enable users personal email address.
Allow User to Delete ODL? Select this option if you would like the user to be able to delete the environment.
Enable Hot Instances: This option can be selected to enable hot instances
Optimize Hot Instances Cost: Shuts down the VMs in deployment upon successful deployment of hot instances
Minimum Available Instances: Defines the minimum number of hot instances to be available at all times
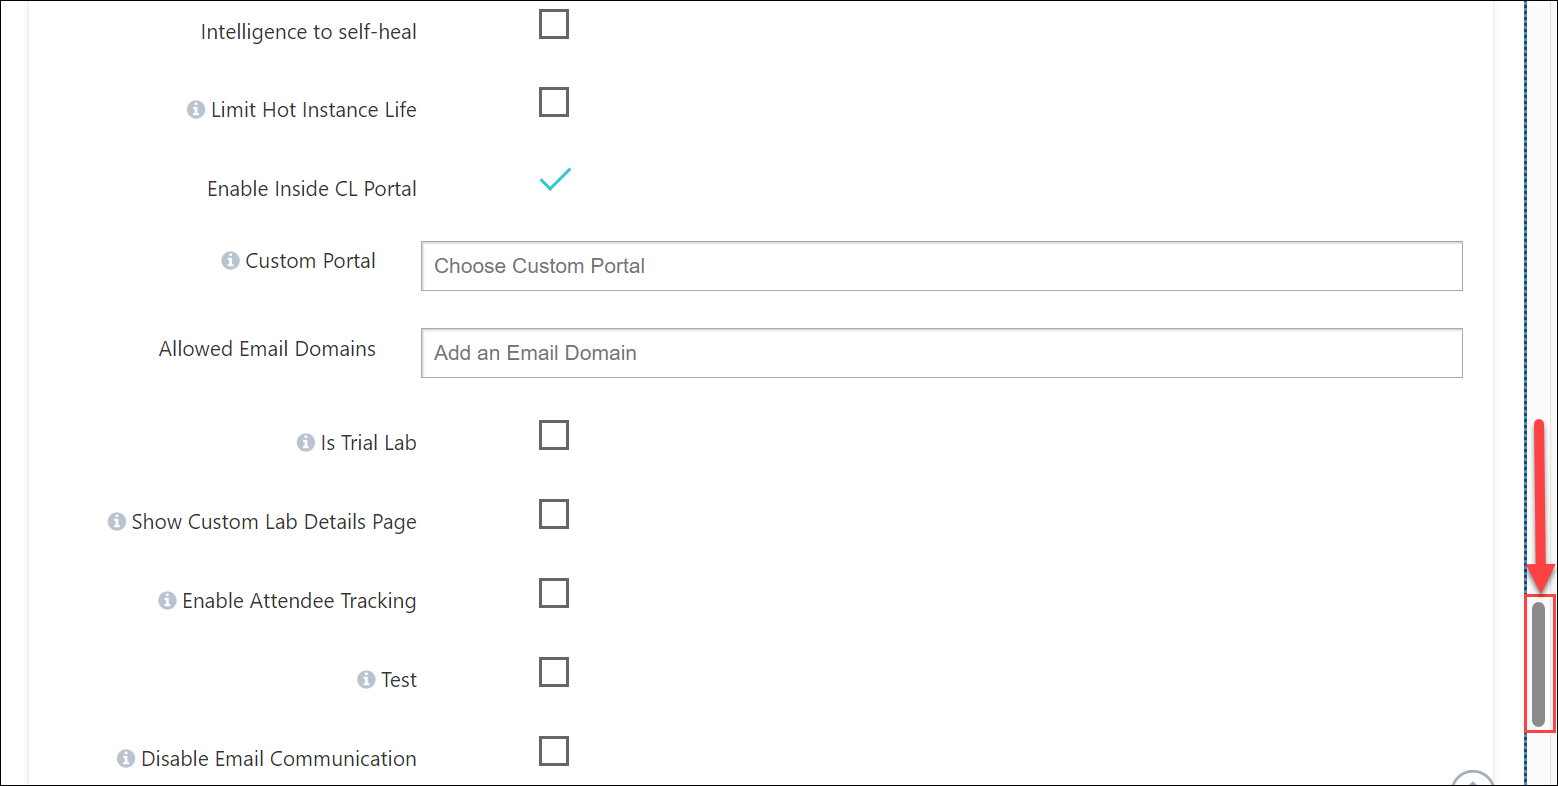
Enable Inside CL Portal: This feature is used to enable access to on -demand labs through CloudLabs portal
Allowed Email Domains: Allow access to particular domain names for CloudLabs portal
Is Trial Lab: Labs marked trial are not considered in the reporting
Test: Labs marked test do not have any alerts triggered.
Disable Email Communication: If this option is selected, email communication is disabled.
Default Language: The environment can be enabled in either of the listed languages.
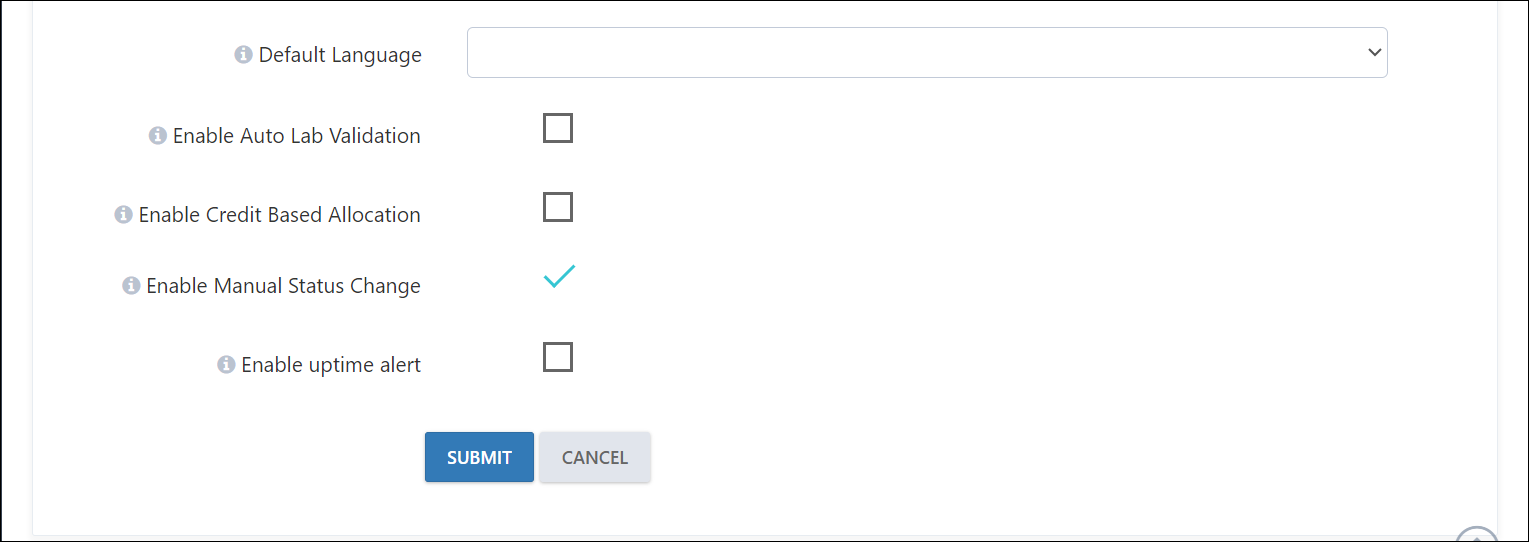
Enable Auto Lab Validation: Leave the box unchecked
Enable Credit Based Allocation: Leave the box unchecked
Enable Manual Status Change: Leave the box unchecked
Enable uptime alert: Leave the box unchecked
Once your ODL submission is successful, it will show up under the On-Demand Labs section of the https://admin.cloudlabs.ai/ portal.
Note: To find more information on ODL, click here to access the guide. You can find information on how to invite users, manage users, extend lab duration and much more.
For Reference: Access GCP VM Based lab onboarding to CloudLabs Admin portal